


---
✓ ElkhartRVParts.com - The Only Authorized Place for Elkhart RV Parts Products
✓ 100% Verified Authentic OEM Grade Part
Universal Fresh Water Tank Fittings Kit with Water Level Sensors
Complete your RV fresh water tank installation with this comprehensive fittings kit designed for DIY enthusiasts and professional installers. Whether you're replacing an existing tank or installing a new one, this universal kit includes everything you need to customize your tank with proper fittings and accurate water level monitoring.
Complete Kit for Custom Tank Installation
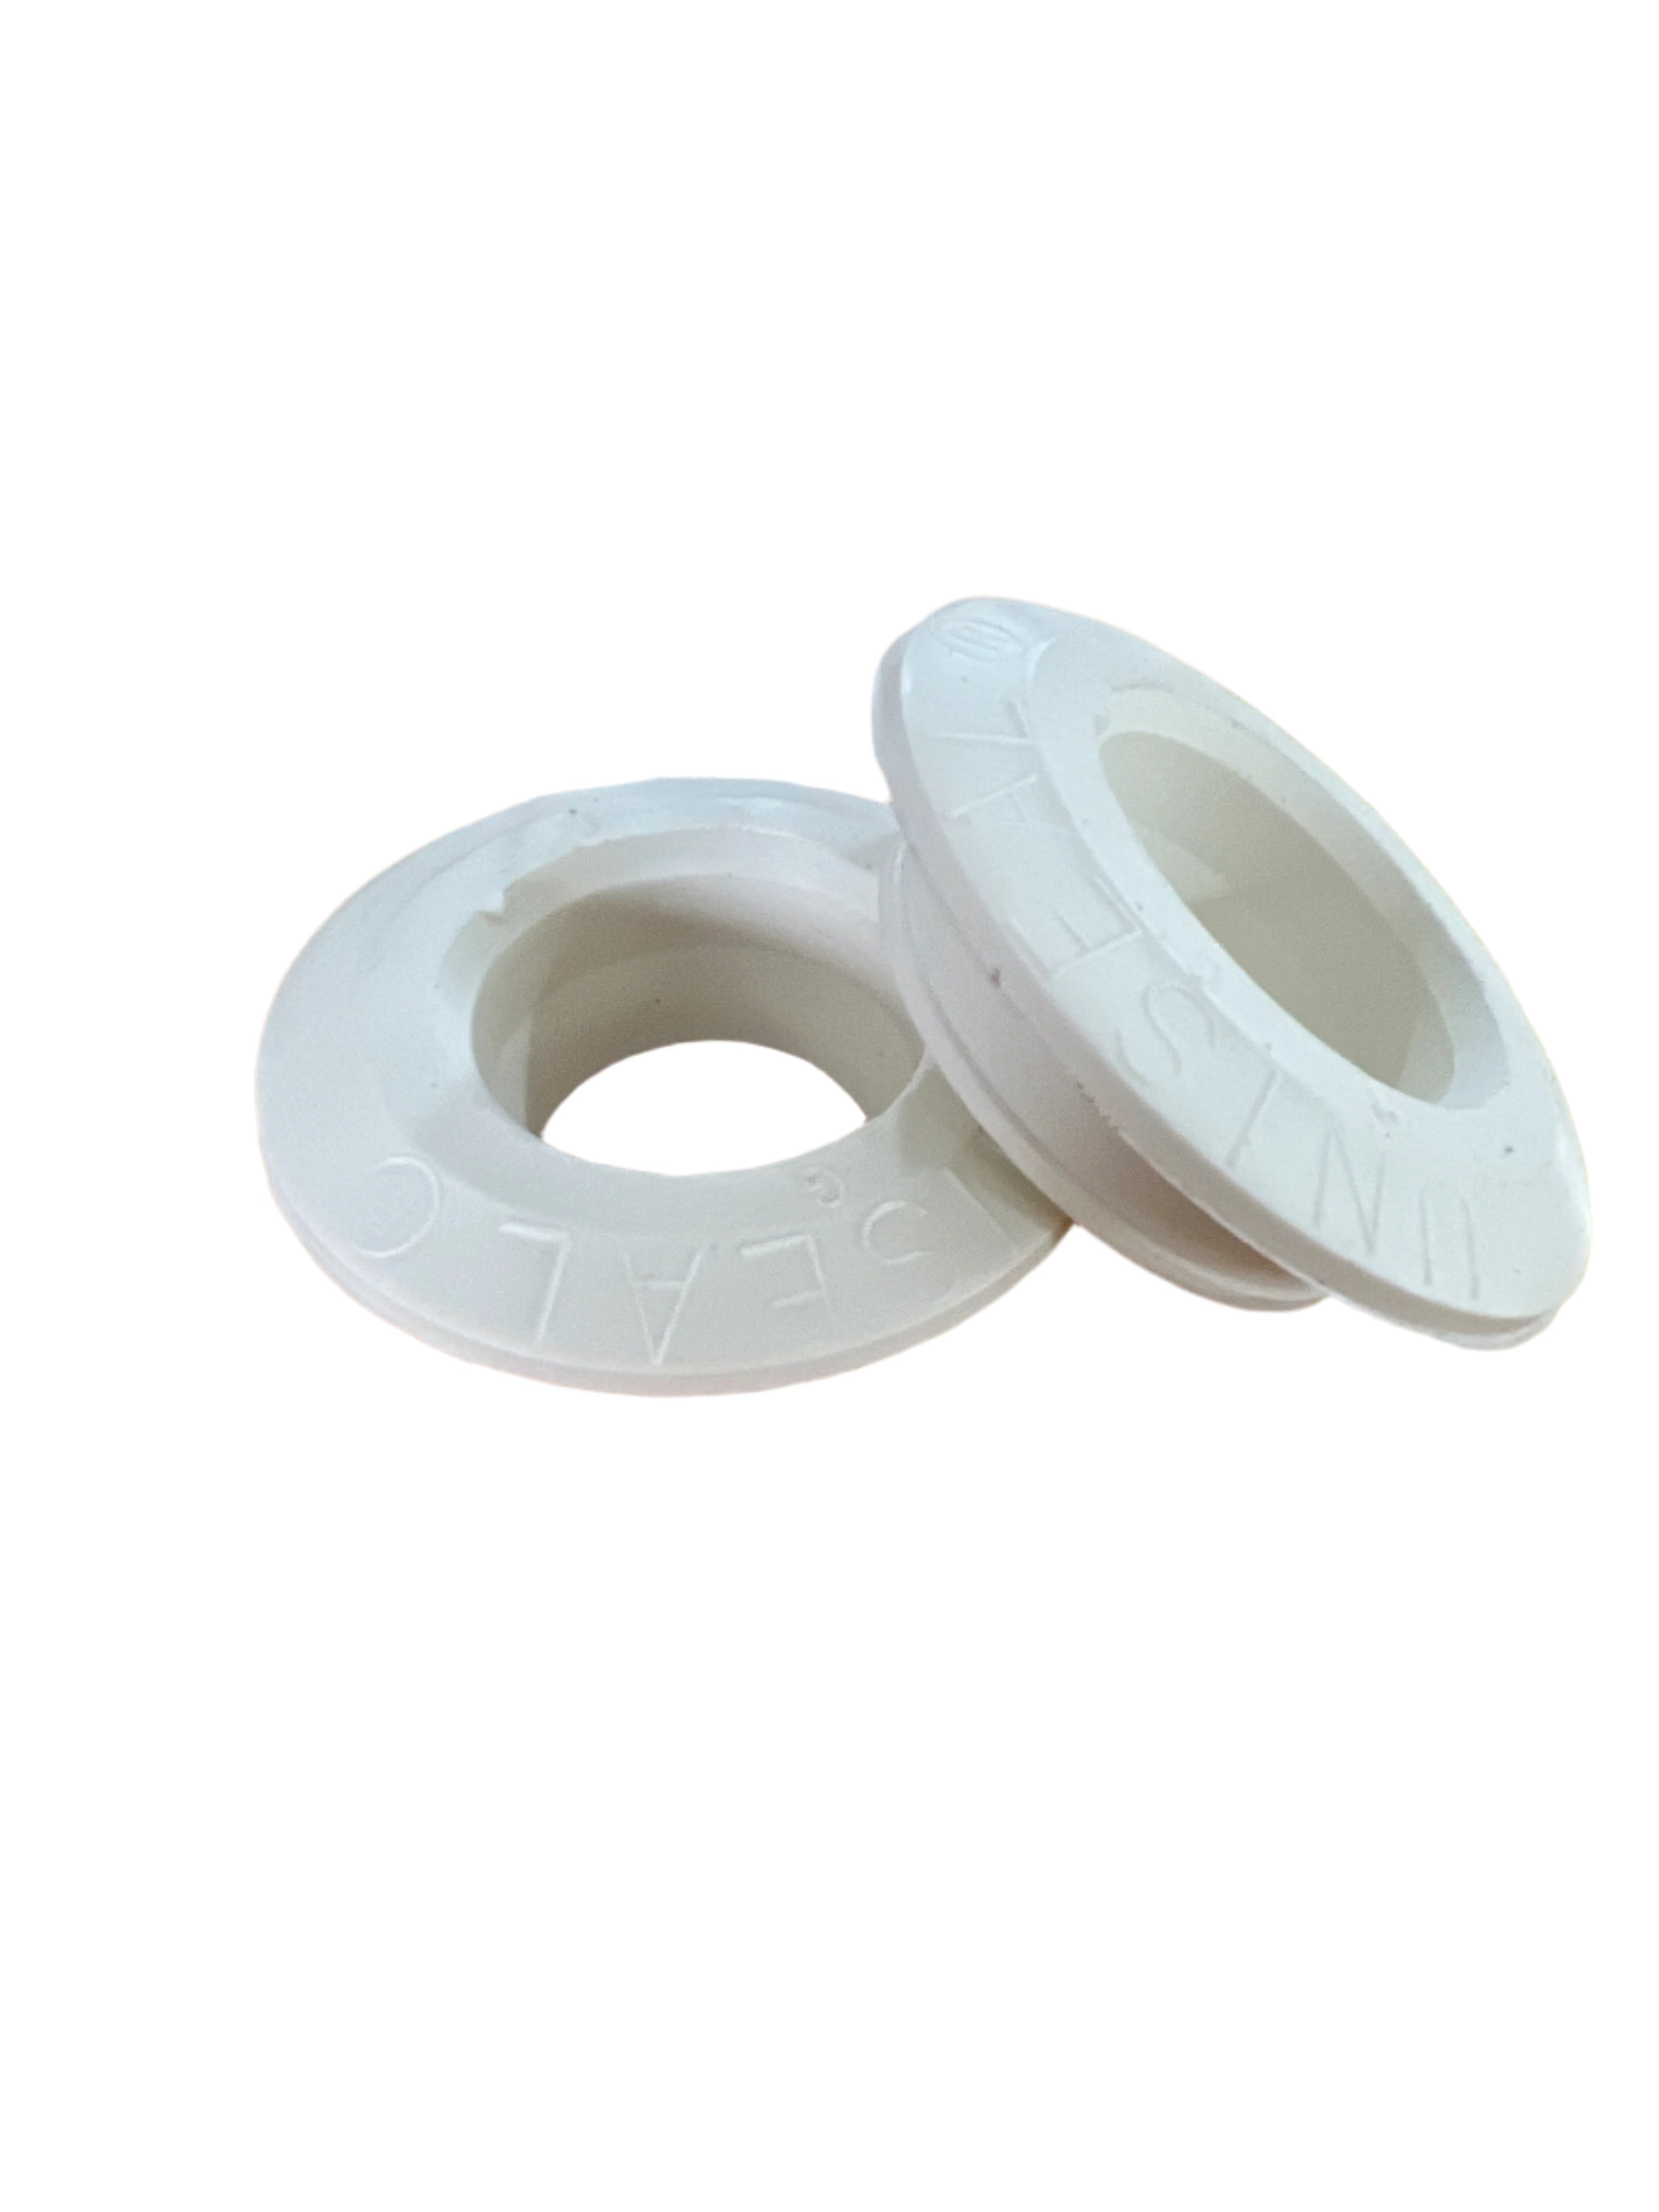
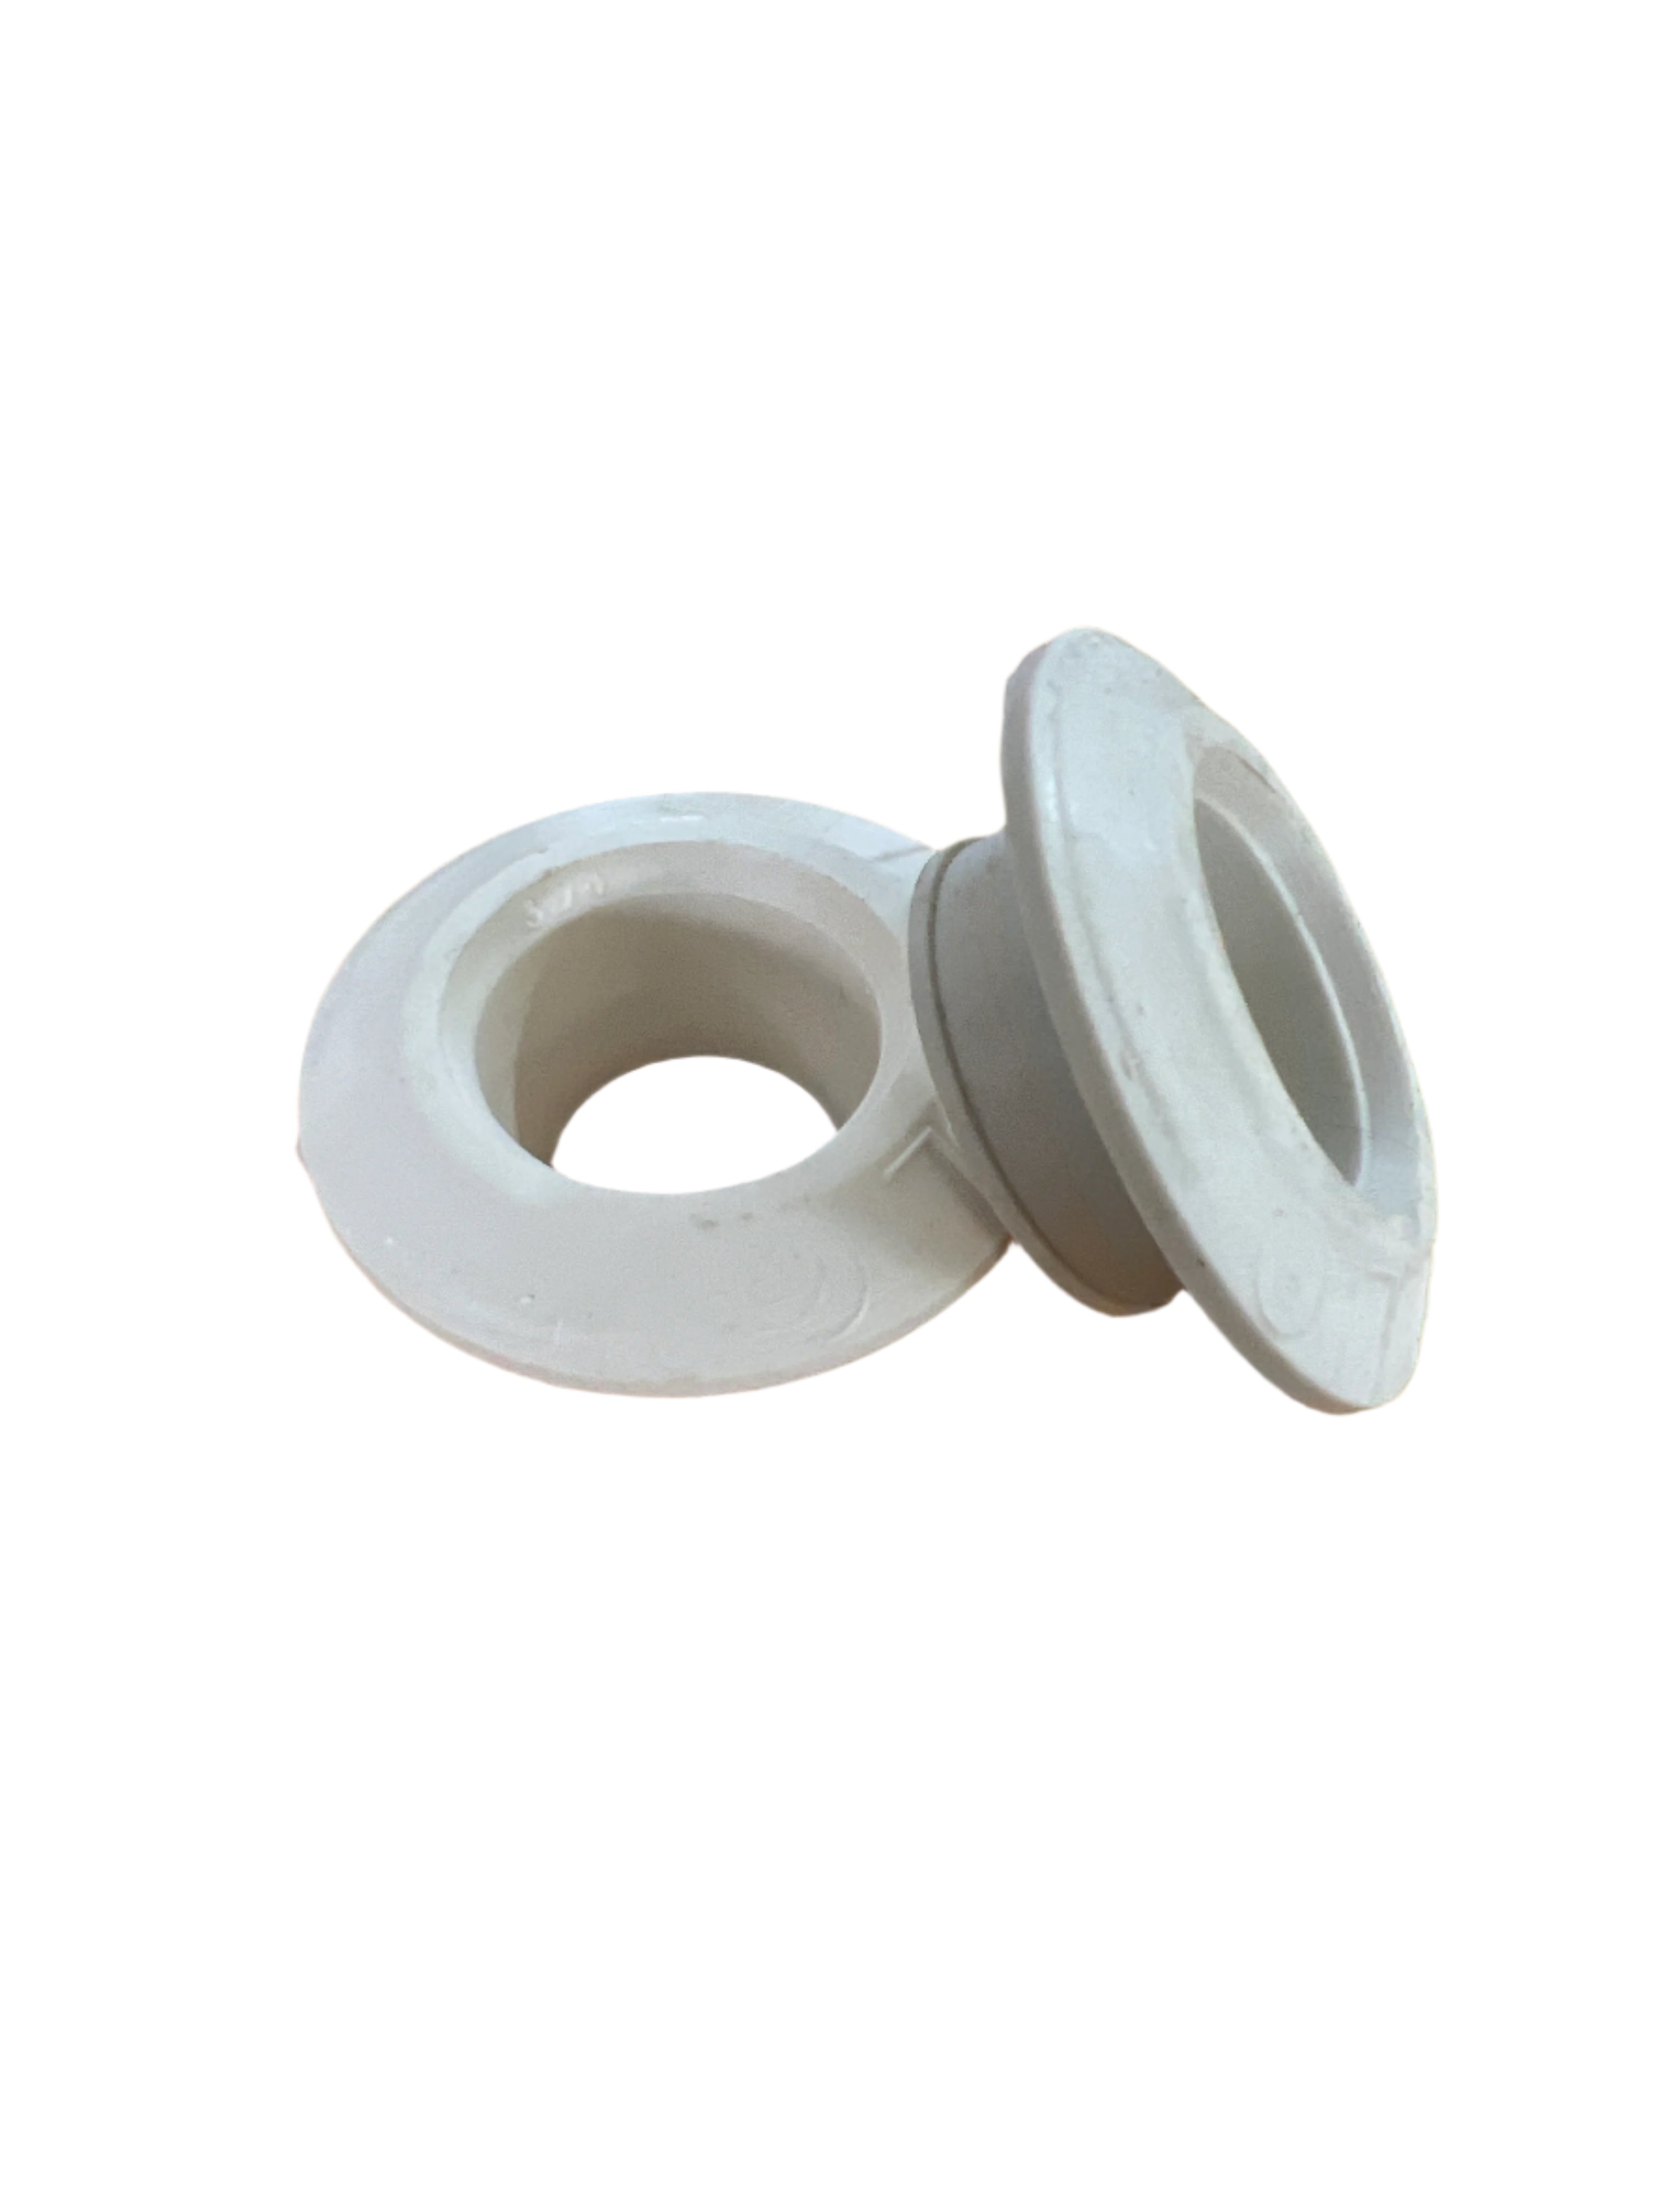
This professional-grade fittings kit is specifically designed for RV fresh water tanks and includes multiple grommet sizes to accommodate standard PVC piping connections plus four water level sensors for accurate tank monitoring. Perfect for anyone purchasing a replacement or upgrade water tank who needs to install fittings specific to their RV's plumbing configuration.
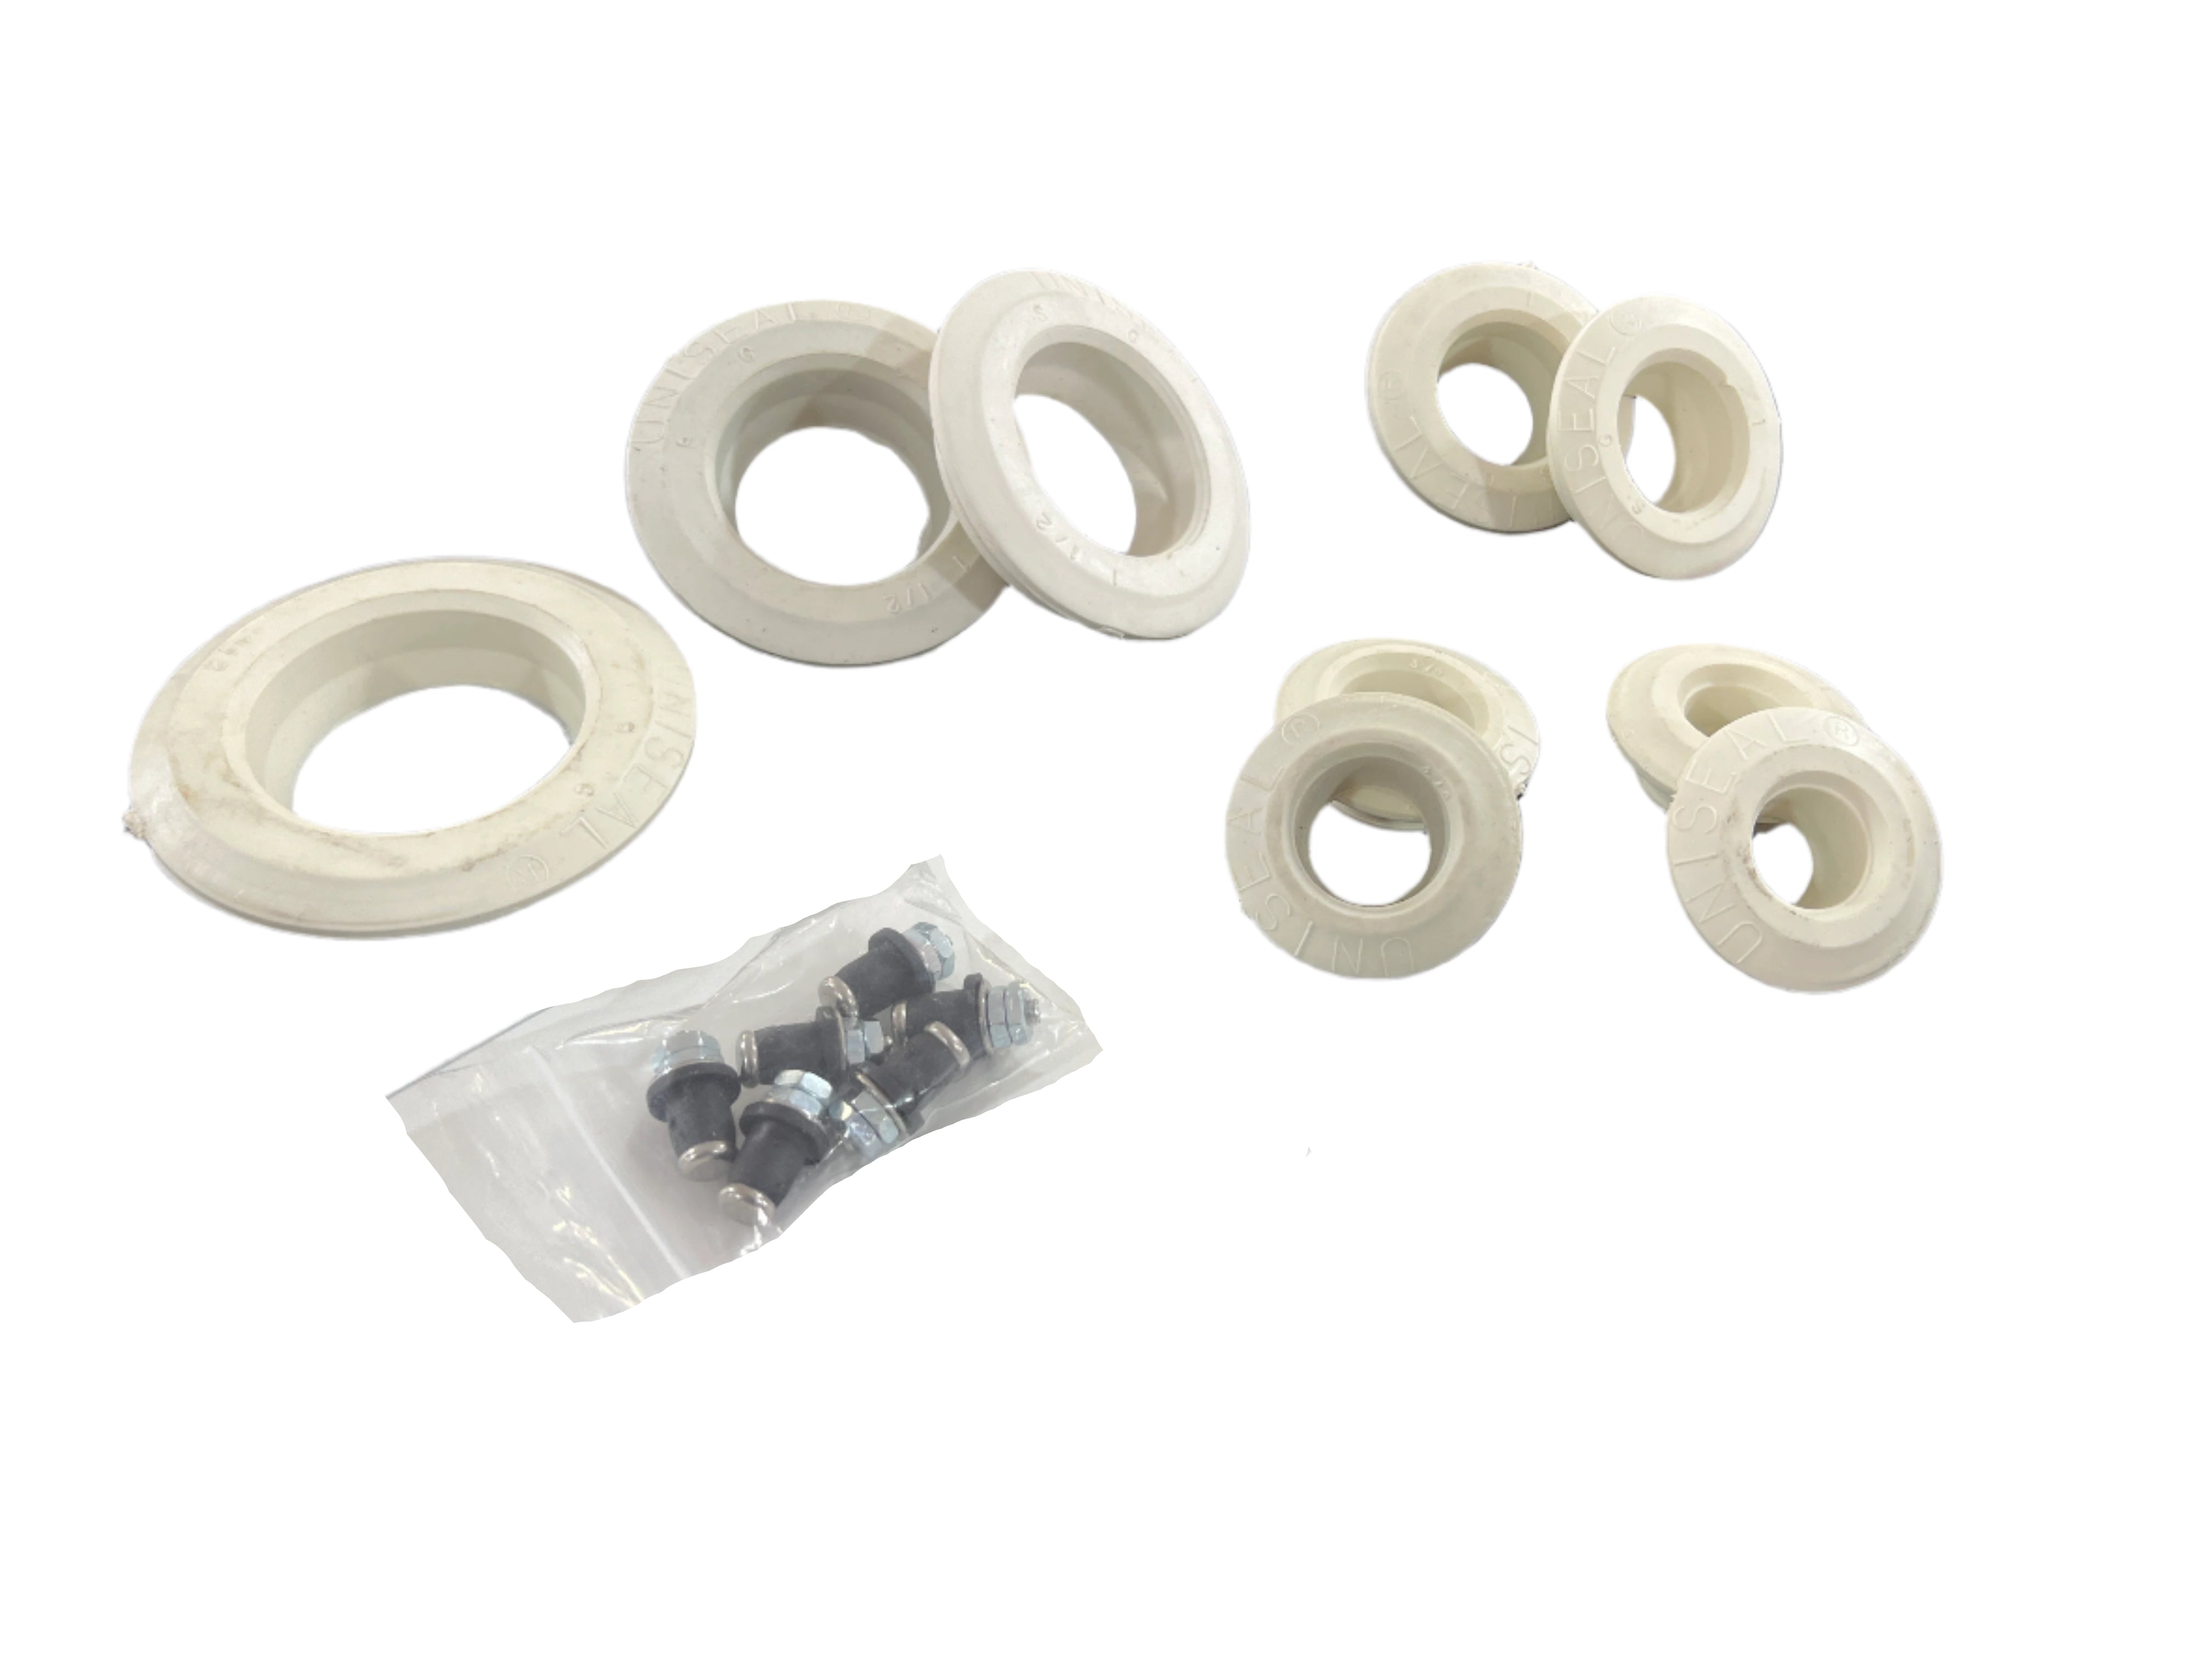
What's Included in the Kit
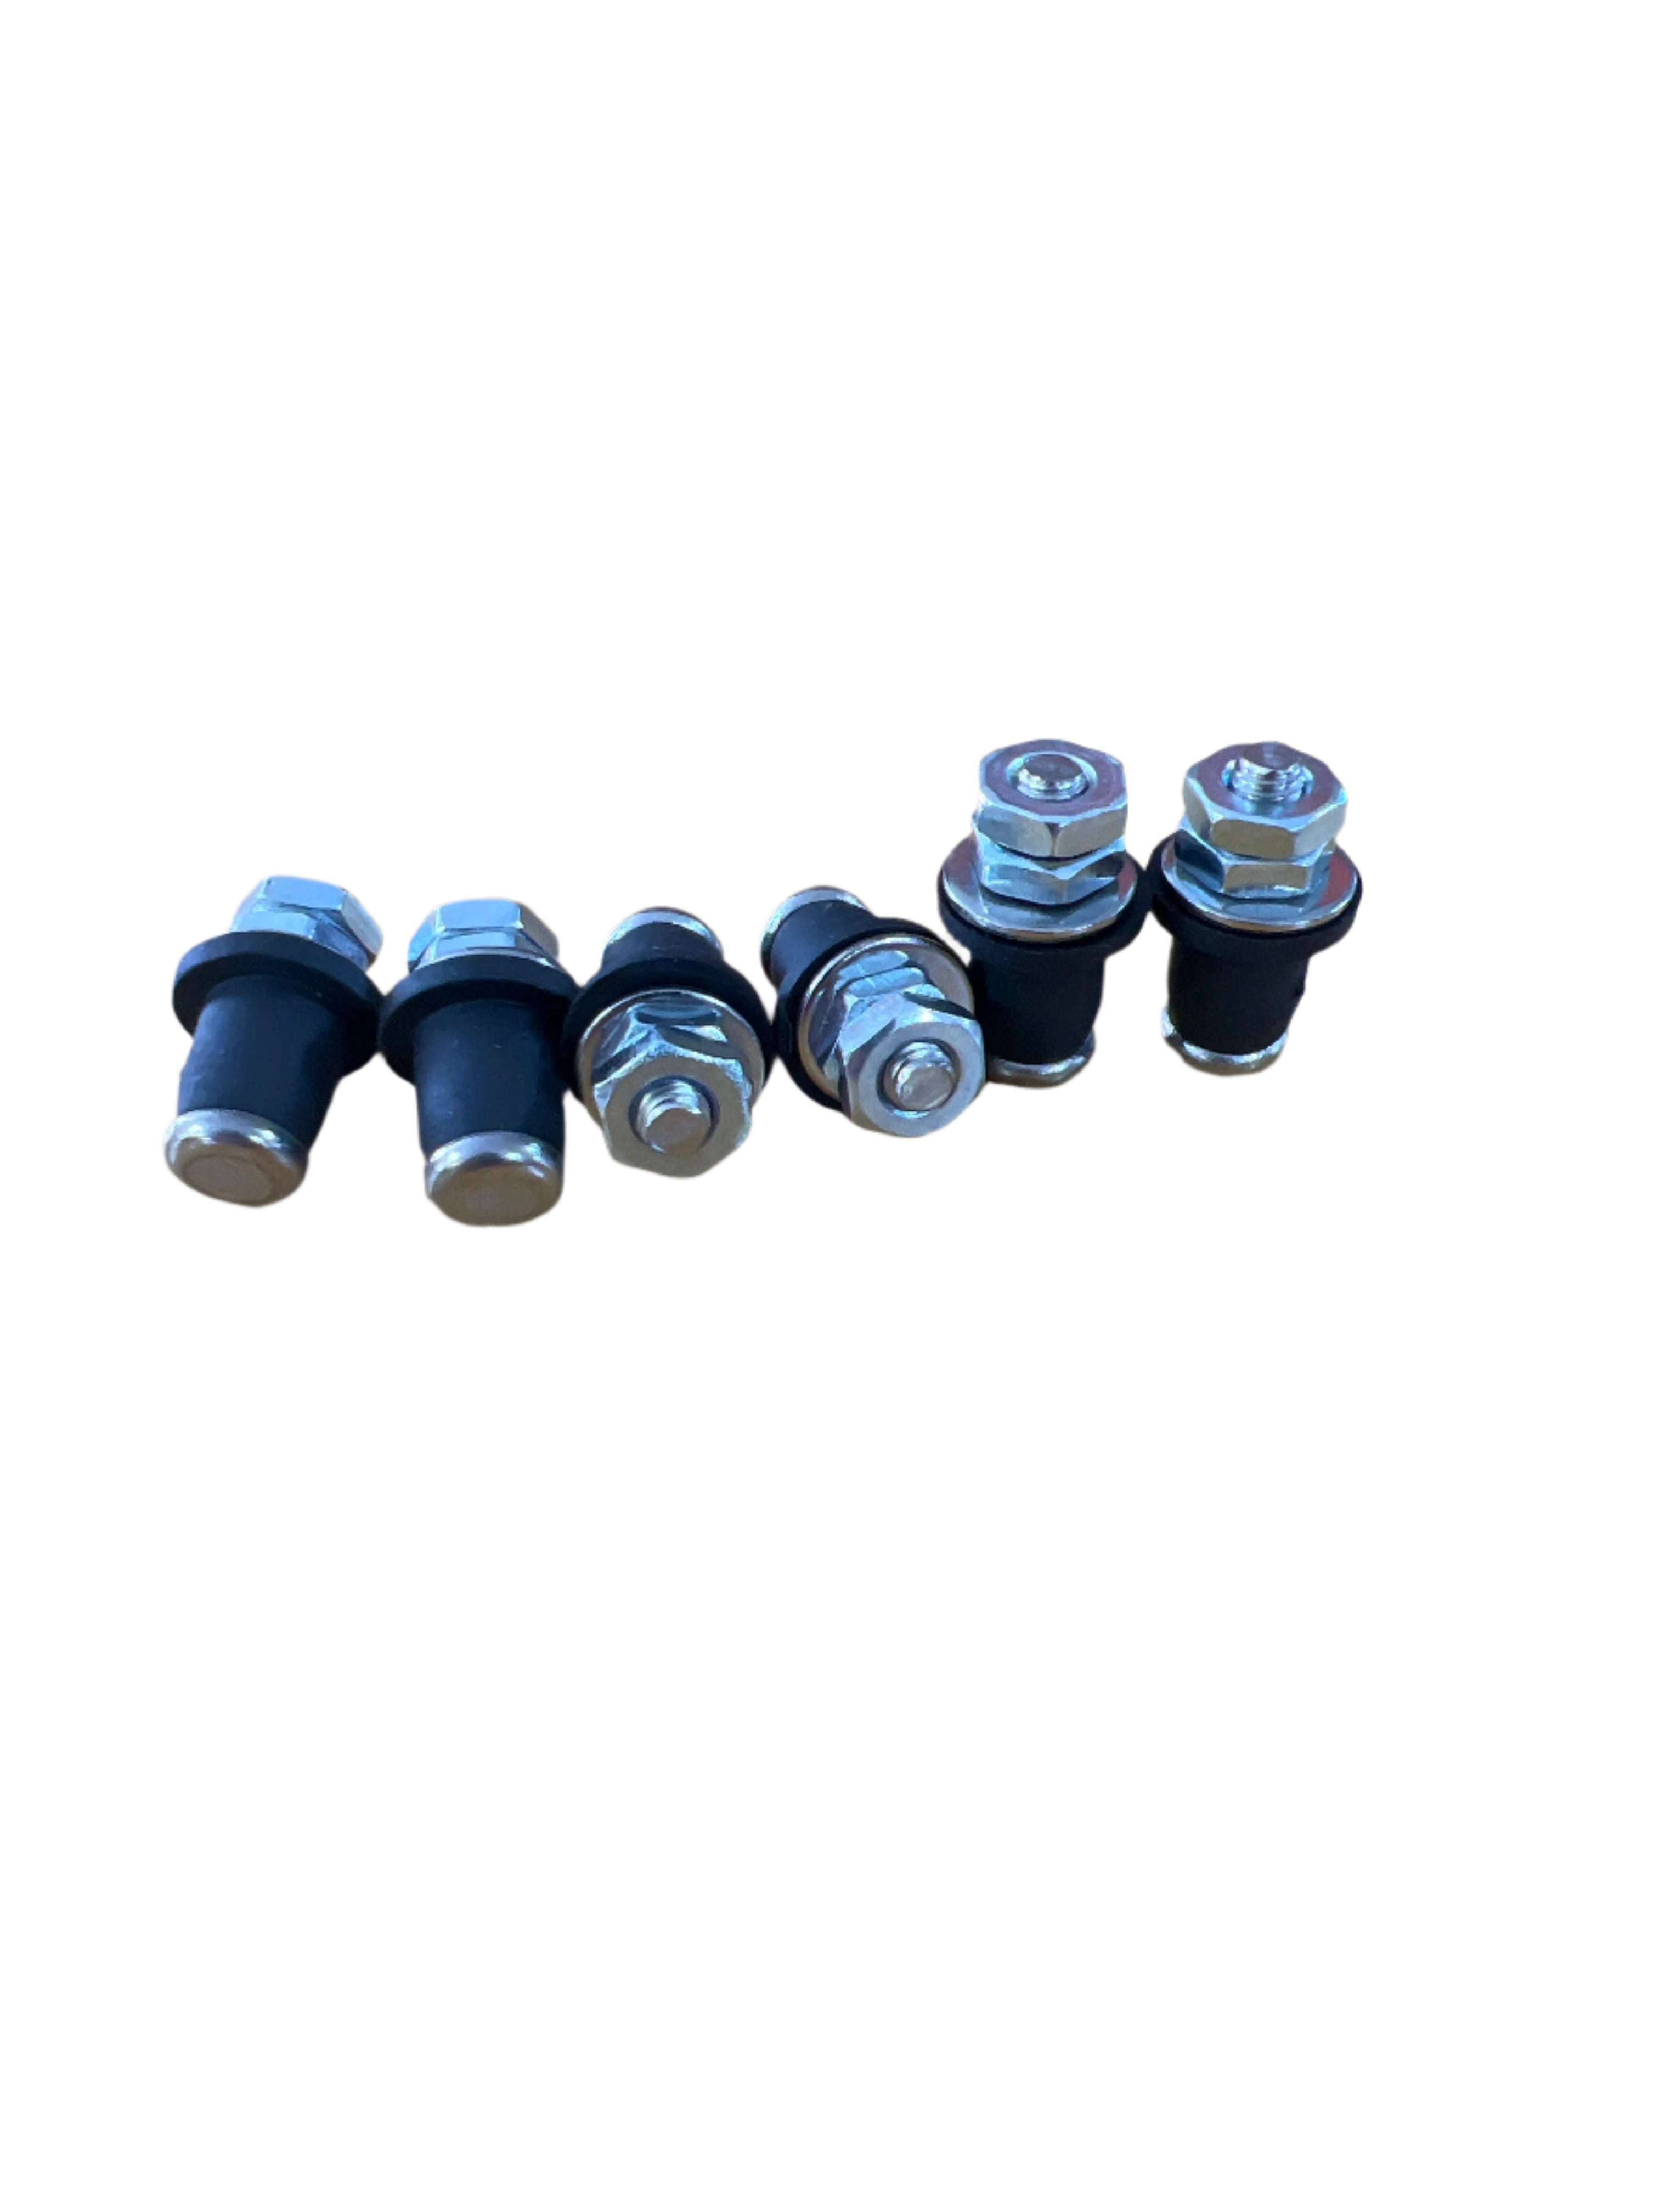
- 4 Mini Probe/Sensor Tank Inserts - Requires 3/8" drill bit for installation
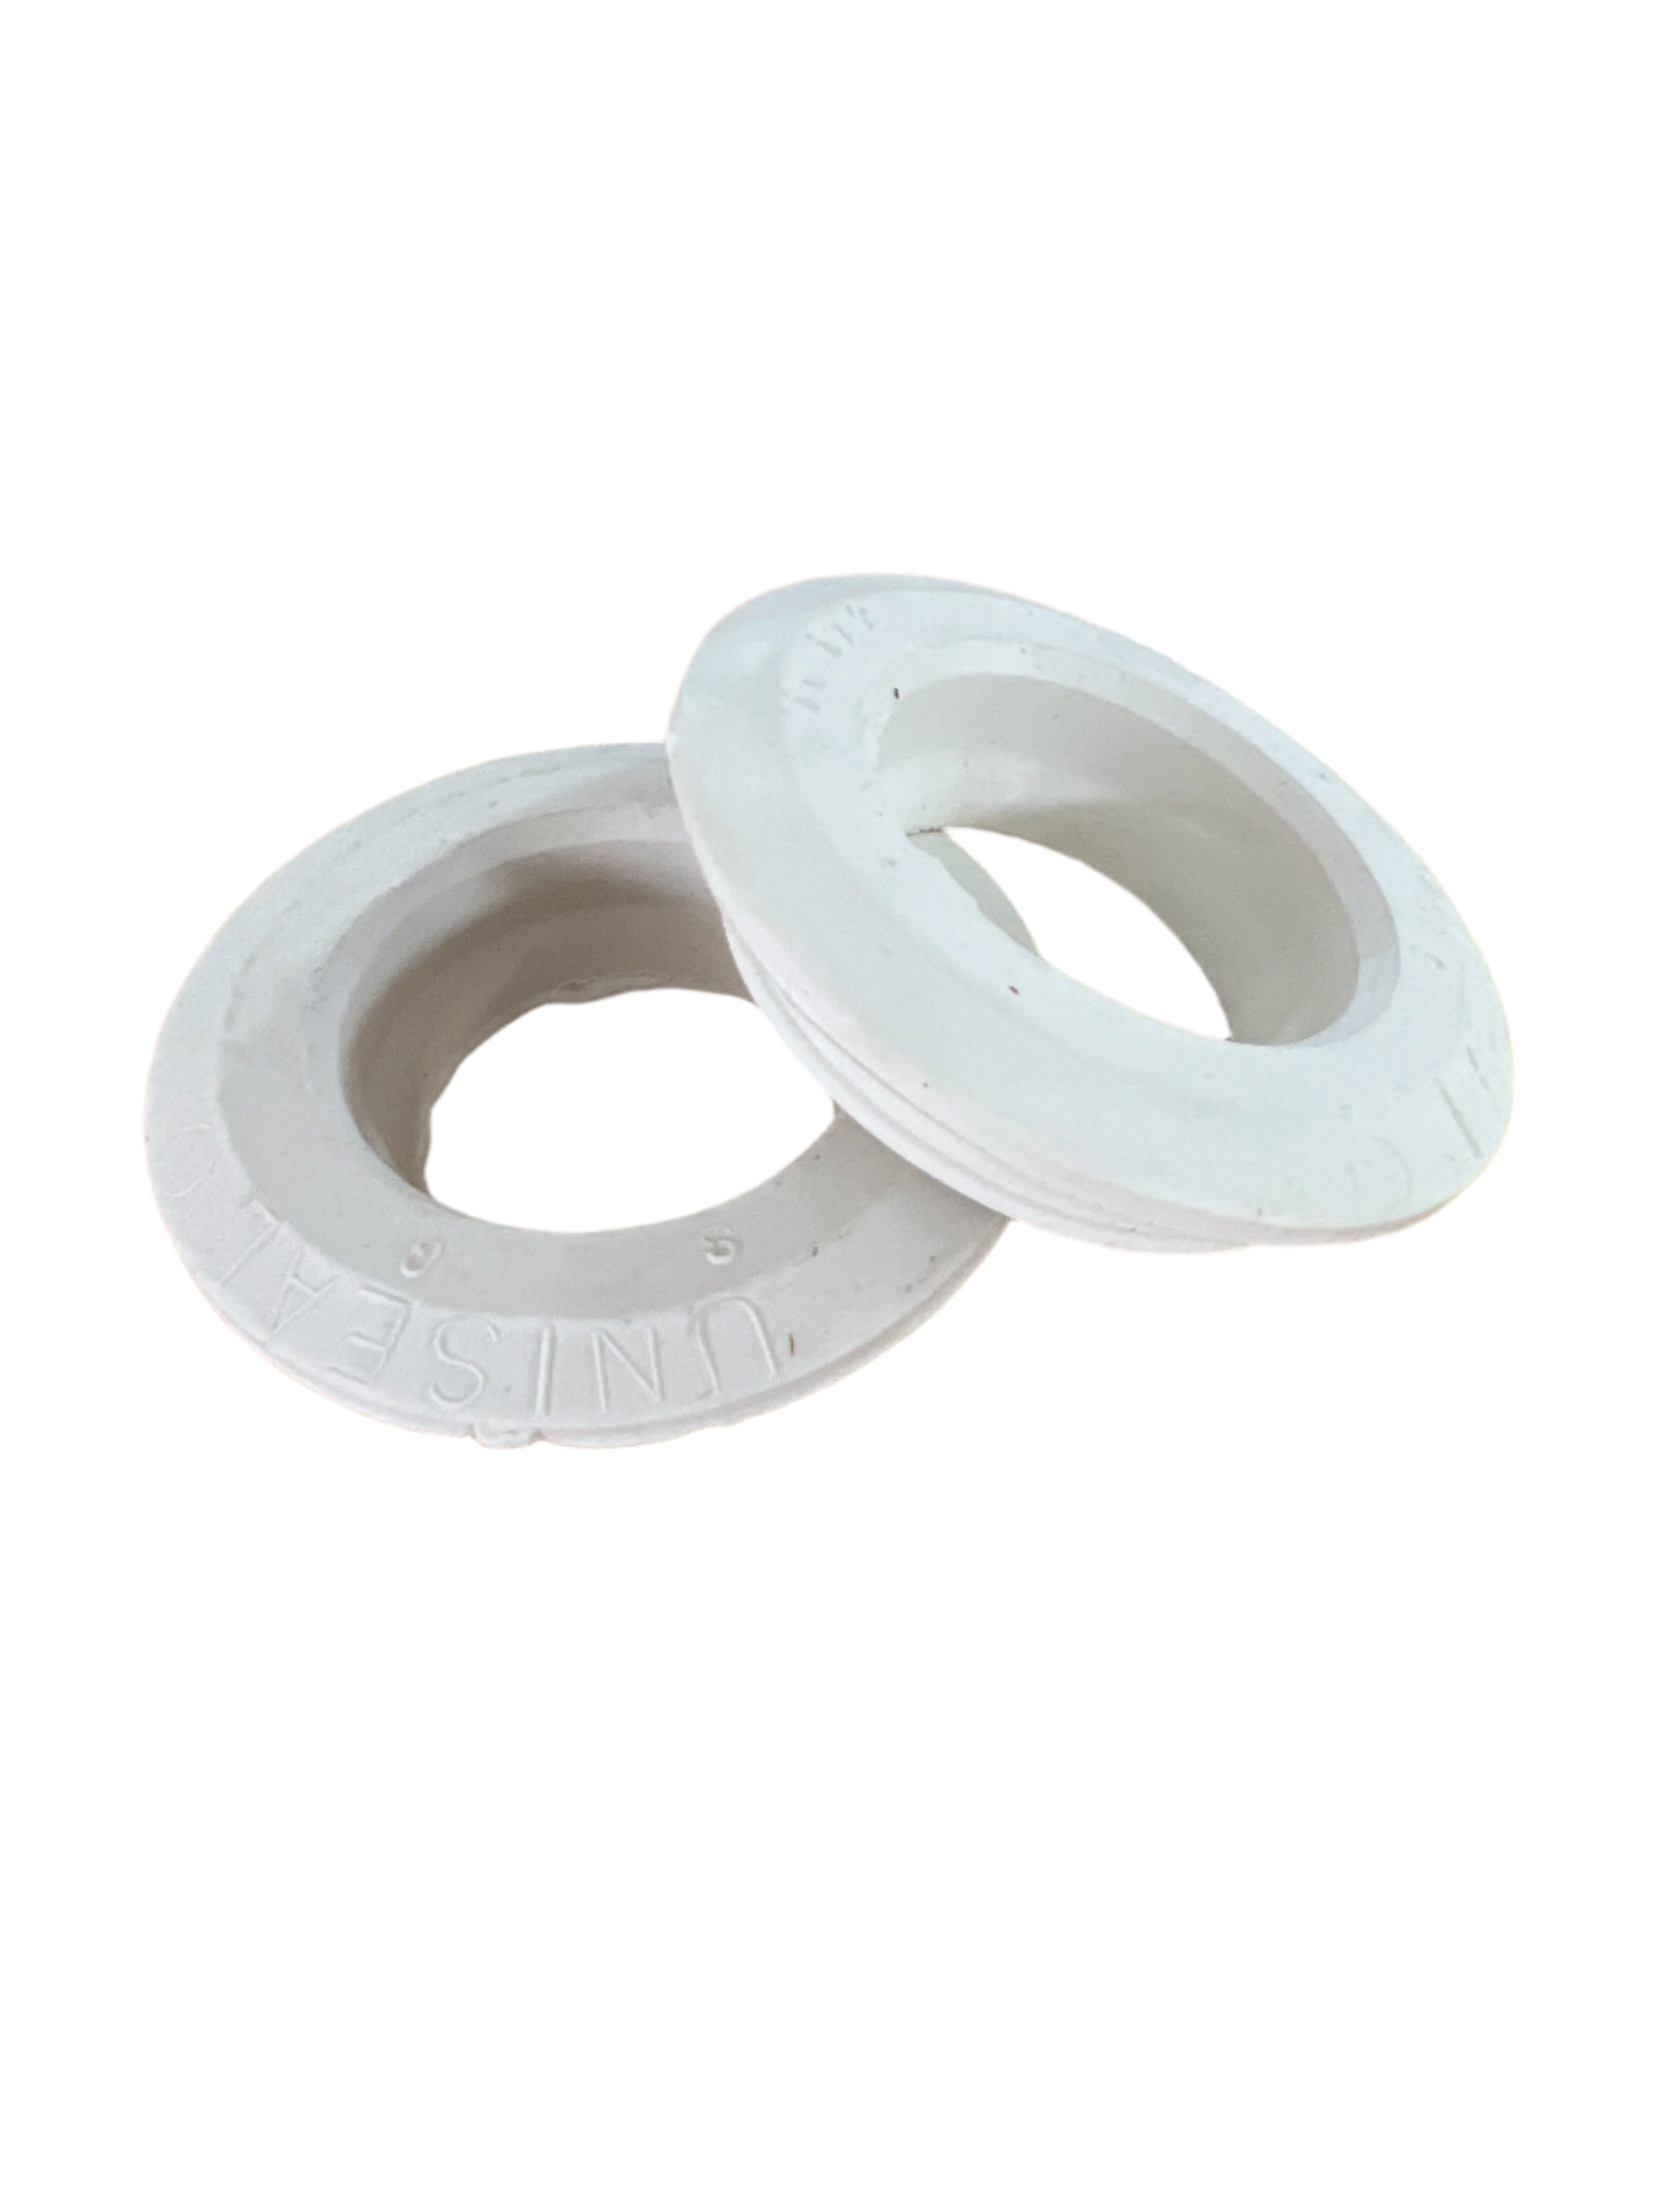
- 2 x 1/2" Grommets (U50W) - Requires 1-1/4" hole saw (white or black, functionally identical)
- 2 x 3/4" Grommets (U100W) - Requires 1-1/4" hole saw (white or black, functionally identical)
- 2 x 1" Grommets (U075W) - Requires 1-3/4" hole saw (white or black, functionally identical)
- 2 x 1-1/2" Grommets (U150W) - Requires 2-1/2" hole saw (white or black, functionally identical)
- 1 x 2" Grommet (U200W) - Requires 3" hole saw (white or black, functionally identical)
Note: Actual fittings may be a combination of white or black grommets, but all are functionally identical and meet the same quality standards.
Tools You'll Need (Not Included)
- 1-1/4" hole saw (for 1/2" and 3/4" grommets)
- 1-3/4" hole saw (for 1" grommets)
- 2-1/2" hole saw (for 1-1/2" grommets)
- 3" hole saw (for 2" grommets)
- 3/8" drill bit (for probe/sensor installation)
- Electric or cordless drill
- Safety goggles
- Tape measure
- Deburring tool (knife or rough sandpaper works)
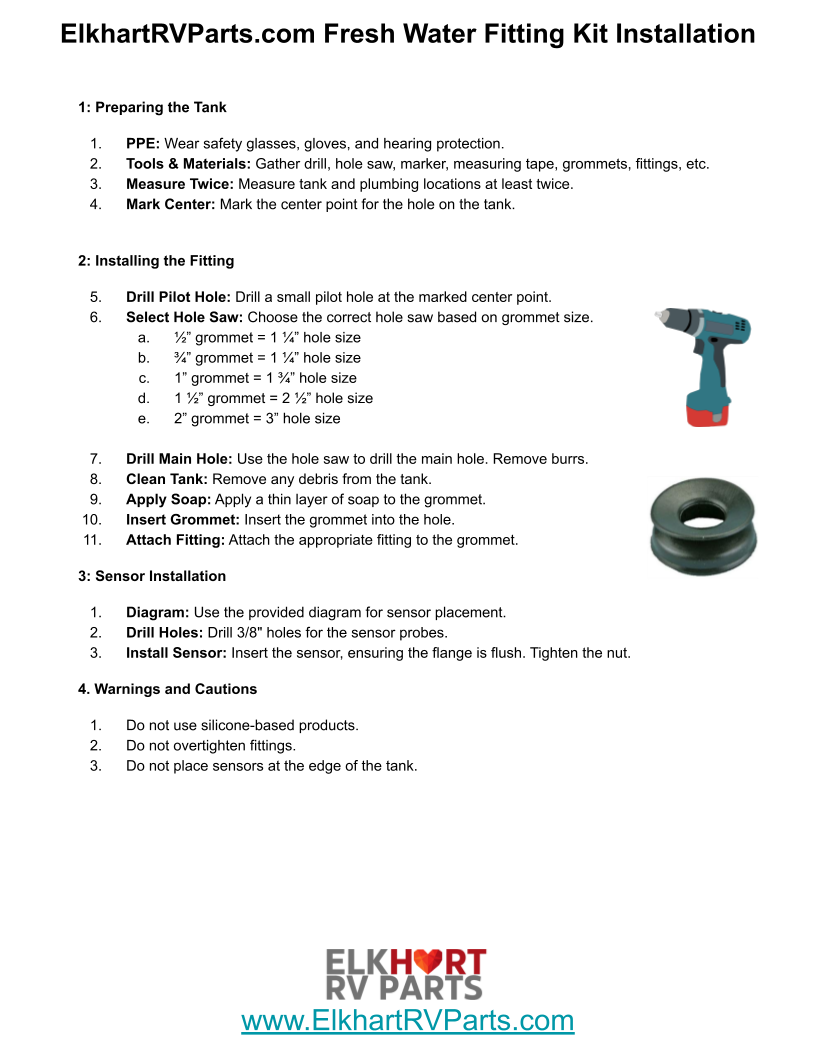
Step-by-Step Installation Guide
Installing Grommets
Your pipe size will determine which grommet sizes you need to install. Follow these steps for a leak-proof seal:
- Mark the Tank - Measure and mark exactly where you want to place each grommet (double-check measurements to prevent errors)
- Create Starter Hole - Make a pilot hole for your hole saw
- Cut the Hole - Use the appropriate hole saw to cut the tank opening
- Deburr the Hole - Remove all rough edges to ensure a tight seal (critical step)
- Install Grommet - Push the short end of the grommet into the hole until flush, checking all sides for proper seating
Installing Water Level Sensors
Sensors measure water levels and help you monitor tank capacity. Keep sensors at least a finger's width from edges for proper sealing.
Standard Sensor Placement:
- Top Sensor (Full Tank) - Place at the end of tank at top center to measure when tank is full
- Middle Sensor (Half Full) - Place at middle end of tank between center and side to measure half-way point
- Bottom Right Sensor (Empty) - Place at bottom towards right corner to measure low level
- Bottom Center Sensor (Empty) - Place at bottom towards center for secondary empty reading
Installation Steps:
- Mark the tank exactly where you want to place each probe (verify measurements)
- Drill the 4 holes using your 3/8" drill bit and remove any burrs for a tight seal
- Push probe sensor into the hole, wiggling into place, then twist nut to tighten
Professional Installation Service Available
Don't want to tackle this DIY project yourself? We offer professional custom fittings installation service where we'll spin weld the fittings directly into your tank before shipping.
View Custom Installation Service (Up to 5 Fittings) →
Premium OEM-Quality Components
- 100% Authentic OEM-Quality Parts - Crafted to meet or exceed factory standards for reliable performance
- FDA-Approved Materials - Made from high-quality, durable polyethylene fully approved for safe drinking water storage
- Universal Compatibility - Works with rotational molded fresh water tanks for RVs, horse trailers, and marine vessels
- Leak-Proof Design - Engineered for superior strength and reliable sealing when properly installed
- Corrosion Resistant - Designed to stay functional for years of dependable service
Complete Your RV Tank System
Looking for tanks to go with your fittings kit? We carry a full range of RV water tanks and related products:
- 10 Gallon RV Fresh Water Tank (17x14x10) - Compact size for smaller RVs
- Browse All Fresh Water Tanks - Complete selection of sizes and configurations
- RV Water Tank Monitors & Probes - Replacement sensors and monitoring equipment
Need Black or Gray Water Tank Fittings?
We also offer a complete fittings kit specifically designed for RV holding tanks (black water and gray water):
Universal Holding Tank Fittings Kit for Black & Gray Water Tanks →
Frequently Asked Questions
Will this kit work with any fresh water tank?
Yes, this is a universal kit designed to work with standard rotational molded RV fresh water tanks. The multiple grommet sizes accommodate various pipe diameters.
Can I use this kit for black or gray water tanks?
While the grommets are universal, we recommend our dedicated holding tank fittings kit for black and gray water applications.
Do I need all the grommets in the kit?
Not necessarily. Install only the grommet sizes that match your specific plumbing pipe diameters. Extra grommets can be kept as spares.
How accurate are the water level sensors?
When properly installed according to the standard placement guide, the sensors provide reliable 4-level monitoring (full, half, low, empty).
What if I make a mistake drilling the holes?
Measure twice, drill once! Use the included installation guide and take your time marking locations. If you're not confident in DIY installation, consider our professional installation service.
Are the white and black grommets different?
No, they are functionally identical. Color variation is due to manufacturing batches, but performance and quality are the same.
Why Buy from Elkhart RV Parts?
We specialize in OEM-grade RV water tank systems and components. Every fittings kit includes authentic, high-quality parts designed for long-term reliability. Our detailed installation guides and optional professional installation service ensure your tank system is installed correctly the first time.
🚚 Fast Shipping - In-stock items ship quickly
Need help selecting the right fittings or have installation questions? Use our AI Live Chat for instant assistance with deep product knowledge and technical guidance.
| Material | Polyethylene |
|---|---|
| Resistance | Stain, Corrosion, and Rust Resistant |
| Construction | Seamless One-Piece |
| Material approval | FDA-Approved |
| Grommet diameter 1 (inches) | 1 |
| Grommet diameter 1 quantity | 2 |
| Grommet diameter 2 (inches) | 2 |
| Grommet diameter 2 quantity | 1 |
| Grommet diameter 1/2 (inches) | 0.5 |
| Grommet diameter 1/2 quantity | 2 |
| Grommet diameter 3/4 (inches) | 0.75 |
| Grommet diameter 3/4 quantity | 2 |
| Grommet diameter 1 1/2 (inches) | 1.5 |
| Grommet diameter 1 1/2 quantity | 2 |
| Sensor insert diameter (inches) | 0.375 |
| Mini probe/sensor tank inserts quantity | 6 |
| Hole saw diameter for 2 inch grommet (inches) | 3 |
| Hole saw diameter for 1 inch grommets (inches) | 1.75 |
| Hole saw diameter for 1/2 inch grommets (inches) | 1.25 |
| Hole saw diameter for 3/4 inch grommets (inches) | 1.25 |
| Hole saw diameter for 1 1/2 inch grommets (inches) | 2.5 |
- What sizes of grommets are included in the universal fresh water tank fittings kit? The kit includes grommets in the following sizes: 1/2", 3/4", 1", 1 1/2", and 2".
- Are the water level sensors included in the kit easy to install? Yes, the kit includes mini probe/sensor tank inserts that are easy to install using a 3/8" drill bit, and detailed installation steps are provided.
- What tools do i need to install the fittings and sensors from this kit? You will need hole saws of various sizes (1-1/4", 1-3/4", 2-1/2", 3"), a 3/8" drill bit, a drill, safety goggles, tape measure, and a deburring tool.
- Can this fittings kit be used with standard pvc piping? Yes, the fittings in the kit are designed to fit standard PVC piping of the same diameter and can be customized to your application.
- Is the material of the fresh water tank fittings kit safe for drinking water? Yes, the kit is made from premium FDA-approved polyethylene material, ensuring it is safe for storing drinking water.
Factory-Fresh OEM Parts — the same brands installed in new RVs straight from Elkhart. Genuine, name-brand components made to order — never generic, never outdated. Sourced directly from the original RV manufacturers for perfect fit and factory-level quality.